Hello Human! Let’s understand something interesting before diving into making this new paper airplane designs. Every Paper airplane has its own functions and goals to satisfy. However, When you make a paper plane you have to try flying it numerous times. Find its pattern of flying and problems – define the actions, study their aerodynamics and some small tweaks and adjustments! That’s it! It will fly great. Floating paper airplane is a nice glider which has a flying pattern like eagle paper airplane which we have posted on our site. So, we have given a mixed name like Floating eagle paper airplane. The similarity is Floating paper airplane and eagle paper airplane are gliders. Enough of science for today! Let’s make this great Floating Eagle!
Two minutes for Noodles! isn’t it? Three minutes for Paper planes! It’s that simple with liftndrift.com*
Supplies Required:
- A4 Sheet of Paper or a Foolscap Paper with 70-90 GSM
- A kid Friendly scissor if you cannot slit the extras by hand with accuracy.
- Ruler or Flat thick object to flatten the folded edges to make a strong crease.
Step 1:
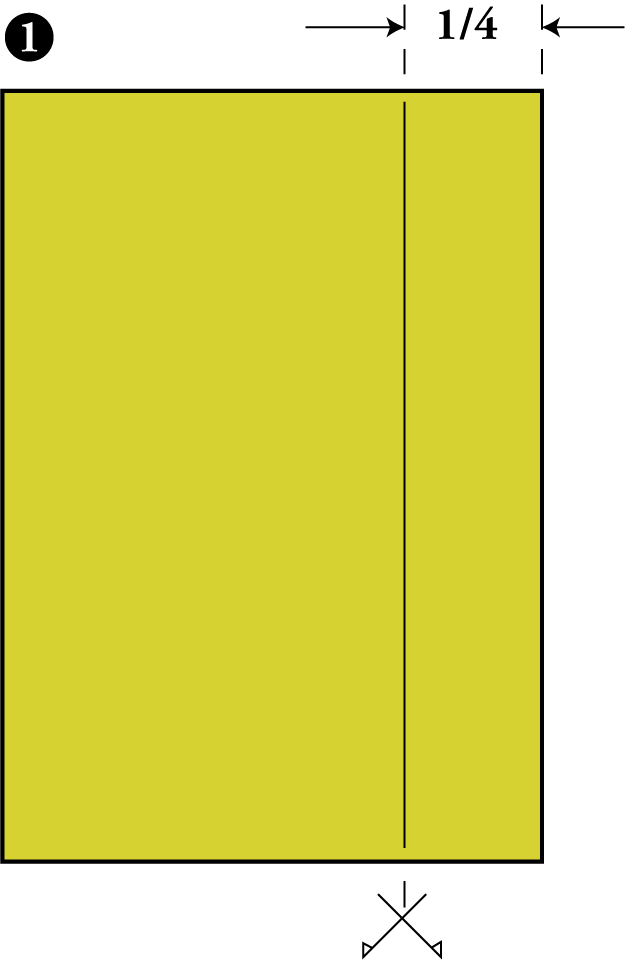
- Cut off one-quarter of the paper’s width.
- If you don’t know how to measure one-quarter. Fold the paper into half and then the folded half into half.
- Unfold now, you will get the quarter space. Trim it!
Step 2:
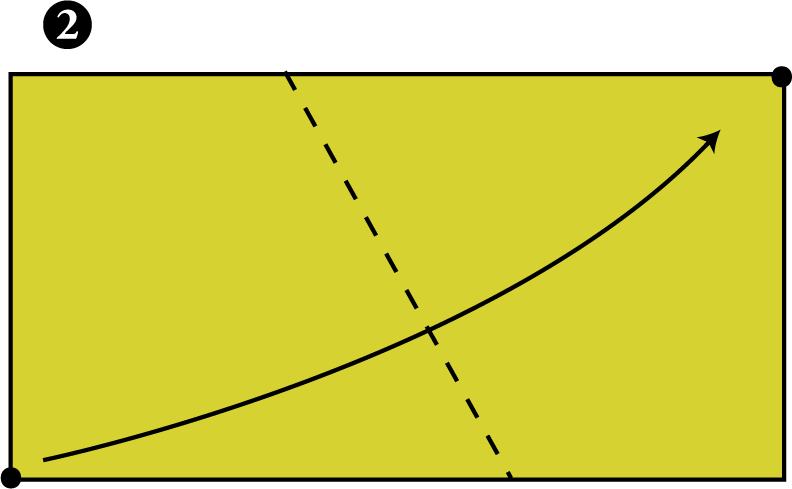
- Now, keep the paper in landscape mode over the table or flat floor
- Fold the left-hand corner up to the top right-hand corner
- If you are still confused check Fig.2
Step 3:
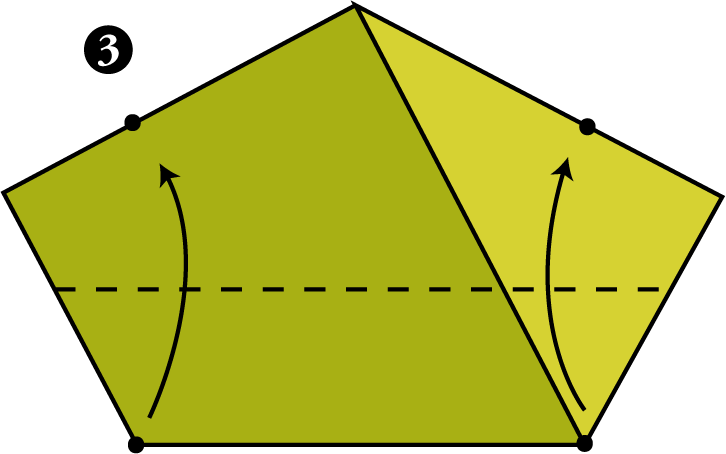
- Look at the Fig.3 there you have two dots joining the upper two dots along the dotted lines as the centre
- Now, Unfold.
Step 4:
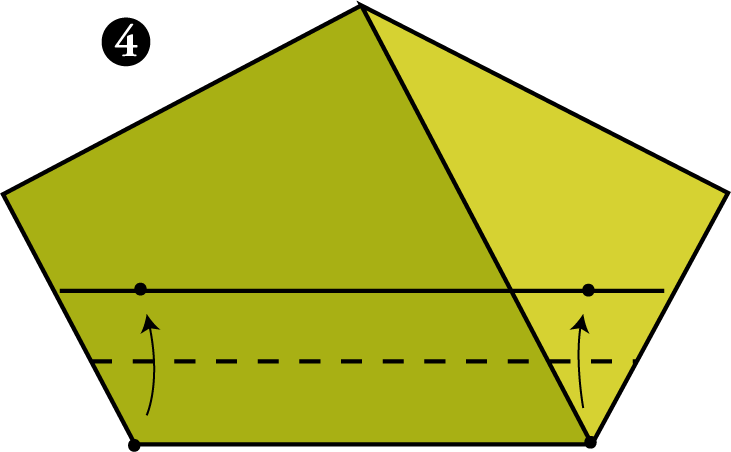
- Fold the bottom edge up to the existing crease to make a new crease.
Paper Plane facts: “While flying in the Humid conditions (or) Wet weathers paper plane absorbs tiny water particles in the air causing failure in the flight“
Step 5:
- Now you have to fold and roll over to complete Step 4 and then step 3
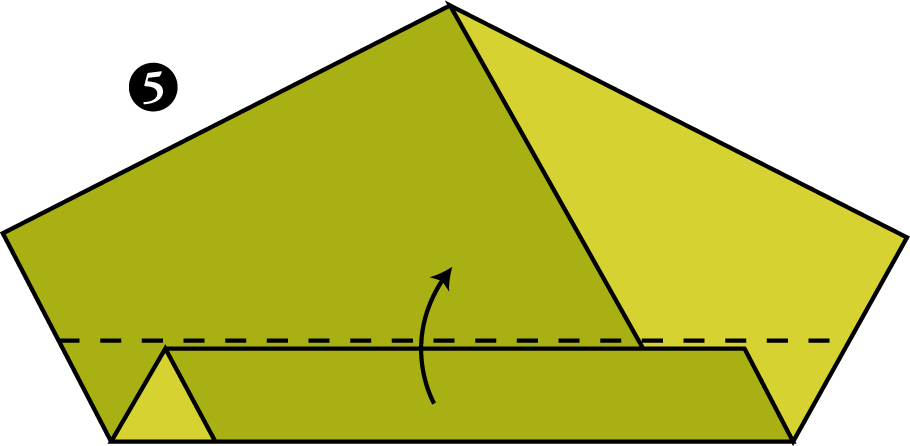
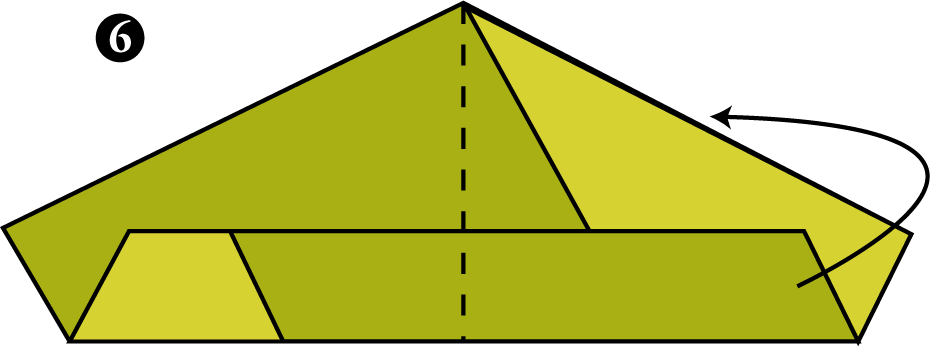
Step 6:
- Mountain fold the paper in half like it is shown in the Fig.6
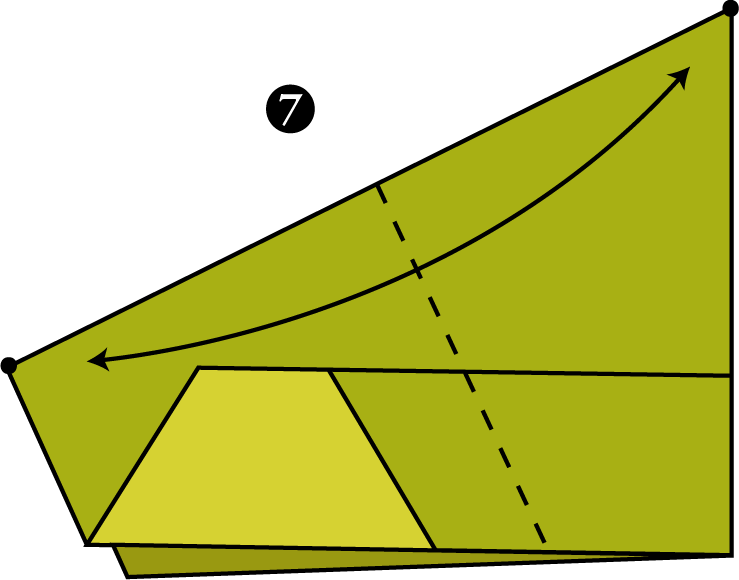
Step 7:
- Look at Fig.7 that is our Step 7
- Just connect the left side dot to the right side dot and make a fine crease
- Do the same for the other side
- Once both sides are over Unfold them
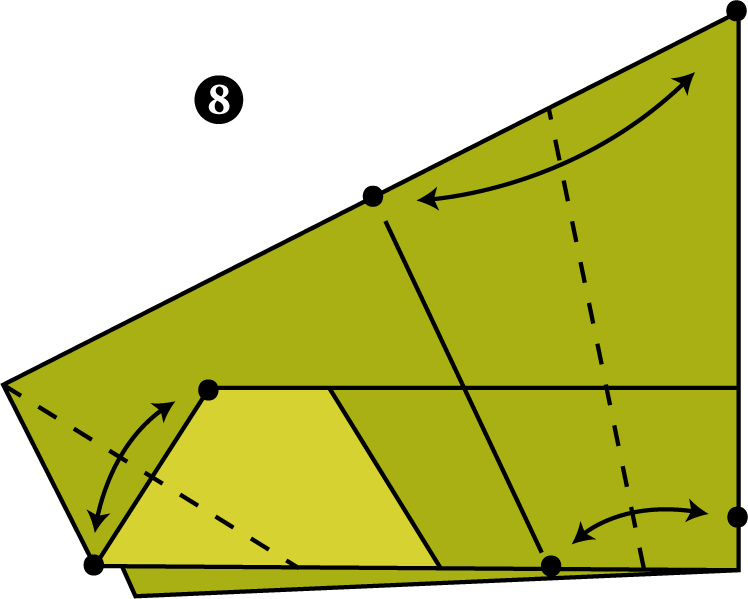
Step 8:
- Fold the middle pair dots over to the top right-hand edge pair
- Fold the winglet at the edge of paper plane
- So many confusions? Refer Fig.8 that’s what I’ve mentioned. Just follow the same
- Do the same for the other side
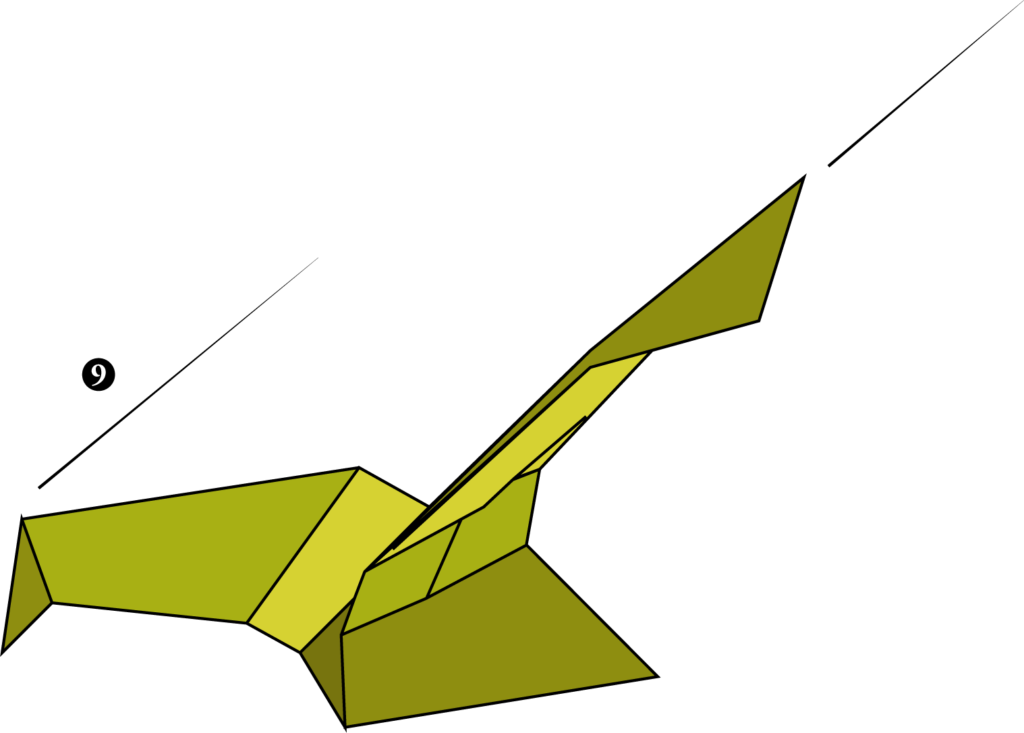
Step 9:
- Now, it is good to soar new heights!
- Your floating eagle is ready to rule the Sky!
- But, Don’t forget to check the Front view of the plane shown next below.

Floating Eagle Paper Airplane Flying Technique:
Hold the Plane behind the centre of the plane’s gravity centre.
Keep your left foot slightly forward and launch it in 30 – 40 degrees angle, throw it steadily with a medium force. If it fails, tweak the tail wing slightly up and try again.
Try different angles and forces now!
Wow, That’s how one learns properly with more trying and flying. Kudos!
Check out our Awesome and cool Boomerang airplane and Origami paper plane free tutorials
- For More Techniques – Go to Flight science – Science behind paper airplanes > Flying Techniques. You will find far more than any other tricks available on the internet for How to fly Paper airplanes!
Please leave your Feedbacks / Replies / Queries in the comment section. Good day!
© LND 2020. All contents on this page are illustrated and instructed by liftndrift.com. Except for the permitted contents by the copyright law applicable to you, you may not use or communicate any of the content on this website, including files downloadable from this site, without the permission of theliftndrift@gmail.com

You can also search for
How to make a paper airplane that flies far

